This ottoman cost $15 but it was rectangular so it would be an easy first experiment.
Step one: Demolition.
Having never ripped apart a piece of furniture before I must say I was a little surprised to find that this was just a wooden box with some padding on top covered in fabric. The top of the box was screwed on so I easily unscrewed it so I could do my tufting work.
Step two: Design choice
There were a couple different ideas in the book I had but I decided to go with tufted top. Since the book did not cover this exact kind of wooden box ottoman I went with my gut and did what I thought would end up looking good. You can see the faint pencil lines where I divided the top into four sections and then arraigned the buttons in a diamond design. I did this for two reasons. One, I thought it looked nice and two, I only had four buttons. I used antique shell buttons that I had gotten at some second hand store years ago. Being a bit of a pack rat helps when you like to do spur of the moment projects.
I forgot to take pictures of my next step which was to drill two small wholes through the wood, right next to each other, where ever button would go. This was so I could have something to sew the buttons to through the fabric and stuffing.
Step three: Fabric choice
I chose an organic purple hemp and cotton blend fabric. This fabric is thicker and sturdier that regular cotton fabric and the purple matches my living room which is purple and orange. You want to use a slightly heavier fabric when upholstering because you have to put a lot of tension on it and regular cotton fabric would just rip. Hemp is a durable and environmentally friendly fabric. So as you can see above I sewed the buttons through the fabric, padding and wood to make these fun tufts. This was the hardest part because the padding is pretty thick and I didn't have the special long needles like they recommend in the book. But I managed it.
Step four: Stapling
After I screwed the top back onto the box I pulled the edges down and stapled them with an industrial stapler. A regular office stapler will not work for this but industrial staplers are readily available and pretty cheap. You can see that I pleated the corners. I thought this pleating went well with the tufting on the top. I could have sewn the corners or done a myriad of other things but this was really easy.
Step five: Cording
For the sides of the ottoman I found (by feeling around) where I bottom of the padding on the top was. I then took a section of my fabric and wrapped the top edge over a piece of cording. Sorry I didn't take any pictures. I was having so much fun. Once the fabric edge was wrapped over the cording I put the raw edge to the ottoman and stapled as close to the cording as I could. This sounds complicated but it was actually pretty easy. The hardest part of this was figuring out how to load more staples into the industrial stapler when it ran out. In the picture you can see the seam where the two ends of the fabric meet. I simple folded one edge over the other and glued it down. I do have some pretty rickrack or edging material to put under the cording so you can't see the staples but I have managed to misplace my glue...
Step six: Feet
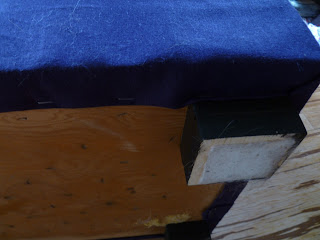
The feet are just scrap wood squares painted black and glued on with wood glue. I also put on some fabric squares on the bottom so we don't damage the floor too badly. Then to finish it off I just folded the fabric edges under the bottom and staples them down. It is no masterpiece but it is comfy to put your feet on.
Unfortunately, the animals love it too and Matt and I really haven't gotten to use it all that much.
In the end I had a really great time reupholstering this ottoman and I hope to do another project soon. Since I already had the fabric and buttons the project only set me back the cost of the ottoman ($15), the cording (about $1), the decorative edging which I have yet to put on (about $4) and a couple of hours of my time. I am sad to report however that the ottoman is so loved that the cat has turned it entirely gray with his fur. Maybe my next project should be upholstered in slick and easy to clean plastic.
If you want to check out the book I learned this from it is called Style, Stitch, Staple and is a great beginner resource. I hope this has inspired you to rip up something in your house. If you do, send me a photo and let me know how it goes. selbygunter@yahoo.com


No comments:
Post a Comment